

A practical guide to cleaning schedules, coil replacement, battery care, and safe storage
Regular maintenance keeps your vaporizer producing clean flavor and reliable vapor while extending the device’s usable life. The process takes just a few minutes after each session and a deeper clean every one to two weeks, depending on how often you use it. This guide covers every maintenance task you need, backed by manufacturer and specialist sources.
How Often Should I Clean My Vaporizer?
The easiest way to think about vaporizer cleaning is two separate routines. A quick surface clean happens after every session and takes under a minute. A full deep clean happens on a schedule you set based on how much you use the device. Skipping either one leads to residue buildup that affects flavor, airflow, and device longevity. [3]
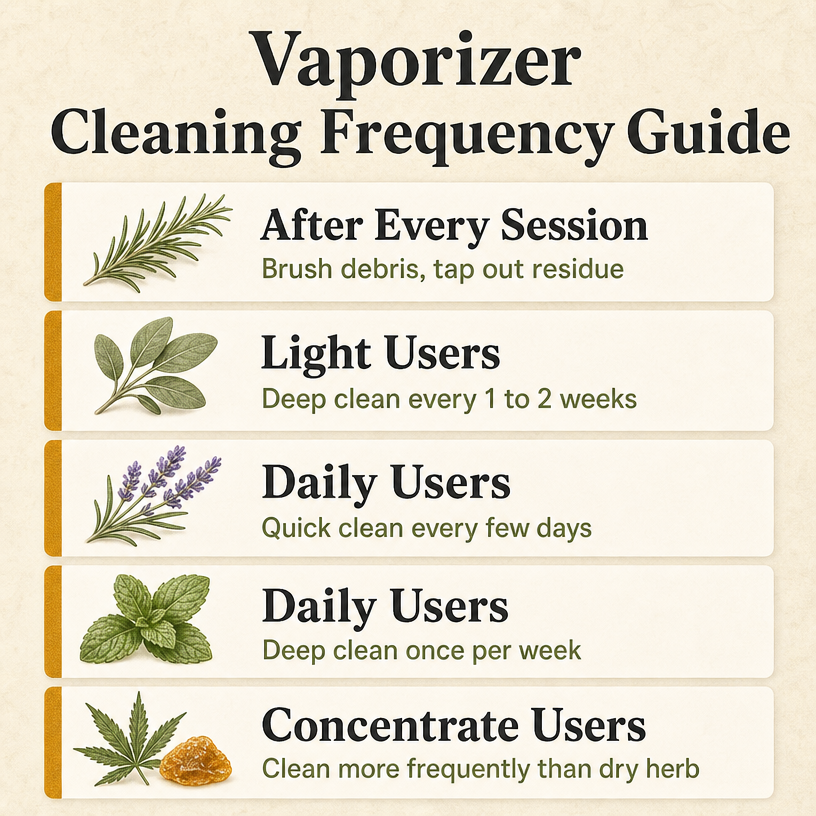
- After every session: brush the chamber and tap out loose debris
- Light users: deep clean every 1 to 2 weeks
- Daily users: quick clean every few days, deep clean once per week
- Concentrate users: clean more frequently than dry herb users
- Perform a deep clean immediately when flavor turns muted or airflow feels restricted
After every session, brush out the heating chamber and tap the device gently to dislodge loose herb or concentrate residue. This prevents buildup from hardening onto the chamber walls and airpath. It is a 30-second habit that pays off over time. [3]
For the deeper clean, your usage level determines the interval. Light users who vape a few times per week can deep clean every one to two weeks. Daily users should quick-clean every few days and deep clean once per week. Concentrate users tend to clean more frequently than dry herb users because residue accumulates faster on heating elements. [4]
If you notice muted flavor, restricted airflow, or visible residue coating the chamber or mouthpiece, stop waiting for your scheduled clean. Those are signals that a deep clean is already overdue, regardless of your usual interval. [3]
Browse Vaporizers to explore related options.
Browse Desktop Vaporizers to explore related options.
Browse Portable Vaporizers to explore related options.
Browse Pen Vaporizers to explore related options.
Browse Dry Herb Vaporizers to explore related options.
Browse Concentrate Vaporizers to explore related options.
What Should I Clean My Vaporizer With?
Isopropyl alcohol at 91% concentration or higher is the standard cleaning agent for cannabis residue on removable glass, metal, and ceramic vaporizer parts. It dissolves residue quickly and evaporates completely, leaving no trace behind when given enough time to air dry. [1] [2]
- Isopropyl alcohol (91%+): dissolves residue on removable glass, metal, and ceramic parts
- Dry brush or pipe tool: dislodges loose debris before liquid cleaning
- Warm water: rinse soaked parts after the alcohol step
- Rubbing alcohol wipes: convenient option for the device exterior
- Avoid: bleach, acetone, harsh solvents, and any soap near electronics
Not every part of your vaporizer can handle soaking in alcohol. Removable glass pieces, metal screens, ceramic mouthpieces, and any other non-electronic components are safe to soak. The heating chamber and any electronic components are not. Use a lightly dampened cotton swab or a soft brush for the chamber, and never let liquid drip into electronics. [3] [4]
There are a few other cleaning agents worth knowing about. Dry brushes and pipe tools work well for dislodging loose debris before any liquid cleaning. Warm water can be used for rinsing soaked parts after the alcohol step. Rubbing alcohol wipes are convenient for the device exterior. Avoid using harsh chemicals like bleach or acetone, as these can damage coatings and plastic housings. [2]
A note on soap and water: it is fine for rinsing removable glass or metal parts after soaking, but never submerge electronic components or use soap on the heating chamber. Moisture inside electronics causes damage that cleaning cannot fix. [3]
Read What Is a Vaporizer and How Does It Work? for more detail.
Read The Complete Guide to Cleaning Smoking Accessories for more detail.
How Do I Deep Clean My Vaporizer Step by Step?
A proper deep clean follows a consistent sequence: disassemble, soak, rinse, dry, and reassemble. Running a burn-off session after cleaning ensures any remaining alcohol residue evaporates before your next session. [2] [3]
- Disassemble the device and remove all removable non-electronic parts
- Brush out loose debris from the heating chamber with a dry brush
- Place removable parts in isopropyl alcohol and soak for 15 to 30 minutes
- Rinse each part under warm running water to remove dissolved residue and alcohol
- Air-dry all parts completely on a clean cloth before reassembly
- Reassemble the vaporizer and run a burn-off session at the highest temperature for 3 to 5 minutes
- Allow the device to cool, then load and use as normal
Before you begin, check that your device is fully powered off and any battery is removed if the design allows it. Gather your supplies: isopropyl alcohol (91% or higher), a container for soaking, clean cotton swabs, a soft brush, and a dry cloth. Working on a clean flat surface makes the process easier and prevents small parts from rolling away.
The soak step is where most of the residue dissolves. Fill a small container with enough isopropyl alcohol to fully submerge the removable parts. Place the parts in the alcohol and let them soak for 15 to 30 minutes. Longer soaking is not harmful, but 15 minutes is enough for routine maintenance on parts with light to moderate buildup. [1] [2]
After soaking, rinse each part under warm running water to flush away dissolved residue and remaining alcohol. Do not skip the rinse step. Alcohol left on parts can transfer an unpleasant taste to vapor even in small amounts. [4]
Set the rinsed parts on a clean dry cloth and let them air-dry completely. This step is critical. Any moisture remaining in the chamber or airpath will cause problems when the device heats up. A common practice is to wipe the chamber with a dry cotton swab immediately after rinsing, then allow the parts to rest for an additional 10 to 15 minutes. [2]
Once all parts are dry, reassemble the vaporizer and run a burn-off session at the highest temperature setting for 3 to 5 minutes. This eliminates any trace of cleaning agents and prepares the chamber for your next session. [3]
Let the device cool after the burn-off, then load it as normal. If you still notice any trace of alcohol smell on the first session after cleaning, run another short burn-off cycle before use.
How Do I Know When to Replace the Coil?
Coils are a consumable component. The wicking material inside degrades each time the coil heats up, and this degradation is irreversible. No amount of cleaning restores a worn-out coil. Understanding when to replace one saves you from a subpar experience without replacing too early and wasting money. [1]
- Coils degrade with each heating cycle and are not restorable through cleaning
- Typical lifespan: 1 to 2 weeks of regular use, with sweeter e-liquids shortening lifespan
- Sudden burnt taste despite a clean chamber and unchanged temperature settings
- Gradual loss of flavor intensity even when the device is freshly cleaned
- Visibly darkened, crusted, or degraded wicking material upon inspection
- Replace with a new coil and prime it with e-liquid before first use
Most coils provide reliable performance for one to two weeks of regular use. Sweeter e-liquids or high-sugar concentrates speed up degradation, which means heavy users of those products may need to replace coils more often. [1]
The most reliable sign that a coil needs replacing is a burnt taste that appears suddenly, even though the chamber is clean and the temperature has not changed. A gradual loss of flavor intensity is another common indicator. If your vapor starts tasting flat or noticeably less flavorful than it did a week ago, the coil is the first thing to check. [1]
Visually inspecting the coil helps confirm the decision. Remove the coil and look at the wicking material. If it appears darkened, crusted over, or visibly degraded, it is time for a new one. Some coils have a visible coil wrap; others hide the wicking inside a housing. Consult your device manual if you are unsure how to access and inspect your specific coil. [1]
Replacing a coil is straightforward in most devices. Unscrew or pull out the old coil, prime the new one by dripping a small amount of e-liquid onto the wicking material, then insert it and fill the tank. Allow the primed coil to sit in the tank for 5 to 10 minutes before the first use to prevent dry hits.
How Do I Extend My Vaporizer Battery Life?
Vaporizer batteries are almost always lithium-ion, and they age whether you use them or not. Charge cycles, temperature exposure, and charging habits all affect how long a battery holds capacity. A few intentional habits make a measurable difference in battery lifespan. [1]
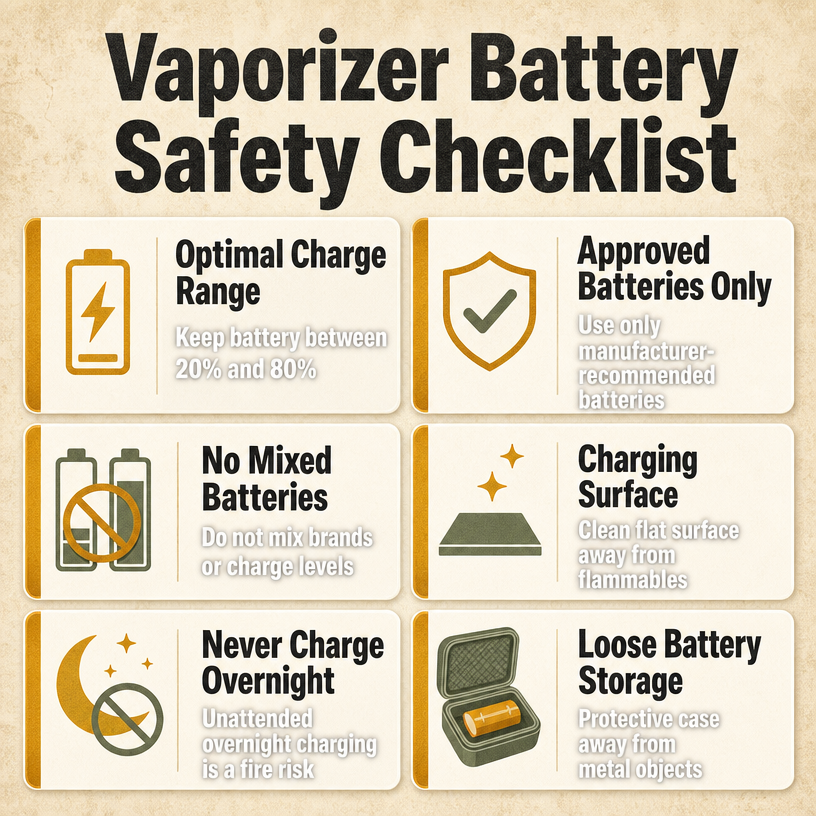
- Keep battery charge between 20% and 80% to reduce lithium-ion stress and extend cycle life
- Avoid frequent full discharges below 20% and regular full charges to 100%
- Protect devices from extreme temperatures — avoid hot cars, freezing conditions, and direct sunlight
- Use only manufacturer-recommended chargers and power sources
- Store loose batteries in a protective case, away from metal objects
- Charge on a clean flat surface away from flammable materials and never charge unattended overnight
The most impactful habit is keeping your battery charge between 20% and 80% rather than charging to 100% or letting it drain to empty. Full discharges below 20% and full charges to 100% both add stress to lithium-ion cells. This is not about occasional use; it is about your regular charging pattern. [1] [5]
Temperature protection matters as much as charging habits. Do not leave your vaporizer in a hot car, near a heat source, or in freezing conditions. Extreme temperatures degrade battery capacity faster and create safety risks. [5]
Use only the charger that came with your device or one specifically recommended by the manufacturer. Mixing chargers or using an unapproved power source can deliver the wrong voltage and damage the battery. [5]
For devices with removable batteries, handle them carefully. Do not carry loose batteries in a pocket or bag where they can touch metal objects like keys or coins. A short circuit from metal contact can cause a dangerous heat reaction. Store loose batteries in a protective case. [5]
Charging on a clean flat surface away from flammable materials is a basic safety practice. Never charge your device unattended overnight, and do not leave it charging while you sleep. [5]
How Should I Store My Vaporizer Safely?
Proper storage prevents physical damage, preserves battery health, and keeps the device clean between uses. The two biggest storage concerns are battery safety and environmental exposure. [5]
- Clean the chamber and airpath before storing to prevent residue from hardening
- Run a burn-off cycle, then allow the device to cool completely before putting it away
- Store loose batteries in a protective case, away from metal objects and conductive materials
- Keep the device in a cool, dry location — avoid cars, garages, and any space with temperature swings
- Empty the tank and chamber before extended storage to prevent leakage and moisture issues
- For long-term storage, remove batteries and store separately at 40% to 50% charge
Before storing your vaporizer for any length of time, clean the heating chamber and airpath. Residue left inside hardens when the device sits idle and becomes harder to clean later. Brush out the chamber, run a burn-off cycle, and let the device cool completely before putting it away. [3]
Loose batteries require their own storage protocol. Keep each battery in a protective case that prevents contact with other metal objects. Do not store loose batteries in pockets, bags, or drawers where they can碰到 keys, coins, or other conductive materials. [5]
Choose a storage location that is cool, dry, and clean. Humidity causes corrosion on metal contacts and electrical components over time. A drawer, cabinet, or dedicated storage case works well. Avoid leaving the device in a car or anywhere with temperature swings. [5]
If you store your vaporizer fully assembled for more than a few days, empty the tank or chamber first. Old e-liquid left in a tank can leak, and herb left in the chamber can create moisture and mold issues. [1]
For long-term storage of devices with removable batteries, remove the battery and store it separately at around 40% to 50% charge. This preserves capacity better than storing a battery fully charged or fully depleted. [1]
What Are Common Questions About Smoking Accessories?
Can I use isopropyl alcohol to clean my vaporizer?
Yes. Isopropyl alcohol at 91% concentration or higher dissolves cannabis residue effectively on removable glass, metal, and ceramic parts. Soak those parts for 15 to 30 minutes, then rinse with warm water and air-dry completely before reassembly. Never let alcohol drip into electronic components.
How often should I replace the coil in my vaporizer?
Most coils provide reliable performance for one to two weeks of regular use. Sweeter or high-sugar e-liquids can shorten that window. Replace the coil when you notice a burnt taste, muted flavor, or visibly degraded wicking material.
Should I charge my vaporizer to 100%?
Avoid charging to 100% regularly. Keeping lithium-ion battery charge between 20% and 80% reduces stress on the battery and extends its overall cycle life. Only charge overnight when necessary, and always on a clean flat surface away from flammable materials.
How do I know when my vaporizer needs a deep clean?
A light user should deep clean every one to two weeks. Daily users should quick-clean every few days and deep clean weekly. If you notice muted flavor, restricted airflow, or visible residue buildup, a deep clean is overdue regardless of schedule.
What happens if I do not maintain my vaporizer?
Residue accumulates in the heating chamber and airpath, which restricts airflow, strains heating elements, and can alter the flavor of your vapor. Over time, neglected residue buildup can reduce the device’s usable lifespan and require more aggressive cleaning to restore performance.
What Is the Best Maintenance Routine for My Vaporizer?
A few minutes after each session keeps your vaporizer in good shape between deep cleans. Brush the chamber, tap out loose debris, and let the device cool before storing it. This habit alone prevents most residue buildup from becoming a problem.
Once a week, or every one to two weeks if you use the device lightly, run a full deep clean. Disassemble, soak in isopropyl alcohol, rinse, dry, and reassemble with a burn-off cycle. Replace coils when flavor degrades, and keep your battery charge between 20% and 80% for longevity.
Safe storage is the final piece. Clean before you store, keep batteries in a protective case, and maintain a cool dry environment. These steps add up to a device that performs better and lasts longer.
Where Does This Smoking Accessory Information Come From?
- Innokin: How to Maintain Your Vaporizer? [Top 5 Ways]
- Healthy Rips: Vaporizer Cleaning Guide | Maintain Peak Performance
- DaVinci Vaporizer: Step-by-Step Vaporizer Maintenance Guide: Keep Your Device in Top Shape
- 42 Degrees: Vaporizer Maintenance Tips That Actually Work
- U.S. Food and Drug Administration: Tips to Help Avoid Vape Battery Fires or Explosions